< Back
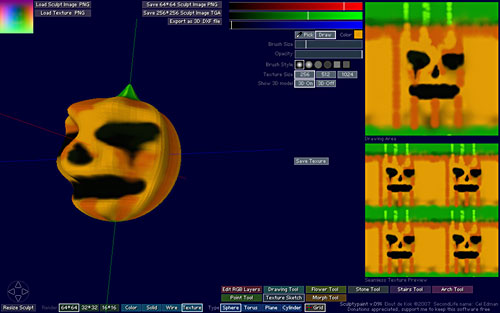
SculptyPaint - Texture Sketch New in v.091
Texture sketch/drawing and seamless texture generator (Work in progress)
This tool is more a sketchtool; It's nice you can mark certain areas like where are the eyes, nose mouth etc. For finetuning the graphic effects, I guess finetuning the texture working in photoshop, paintshop-pro or the gimp, will be 10 times faster and easier.
Like Aminom Marvin told me, people that can create good skins for SecondLife are masters in texturing sculpties as well, since it takes time and detail for making the 3D model look good.
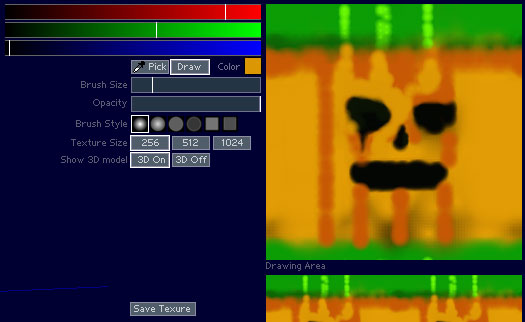
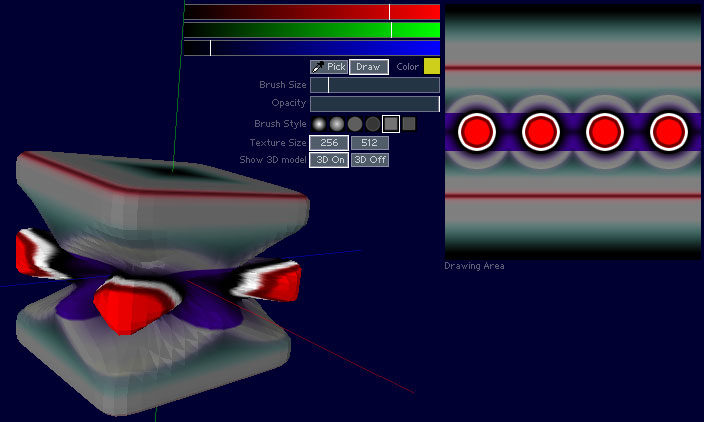
Use the Red, Green or Blue sliders to select a new color.
With Draw selected you can paint in the Drawing Area
With Pick selected you can pick a color from the Drawing Area
You can change the Brush Size
You can change the Brush Opacity (not working correct yet)
You can change the Brush Style
You can change the texture size
256 (slow)
512 (slower)
Show 3D model: 3D On or 3D Off
Hiding the 3D model: 3D off can be handy when just when you want to create textures,
swithing between different software, like you want to work in photoshop or the gimp. Or switch to your Secondlife client. Since showing the 3D model (X ammount every second) can cost some processing power to your computer.
Save Texture
Saves your current texture.
Texture Sketch Example
With this example I start in the Point Tool. Start with a cube. Put Symmetry on for X,Y and Z.
Select a few points, and scale these small on Scale X, Y and Z.
Then smooth it a few times.
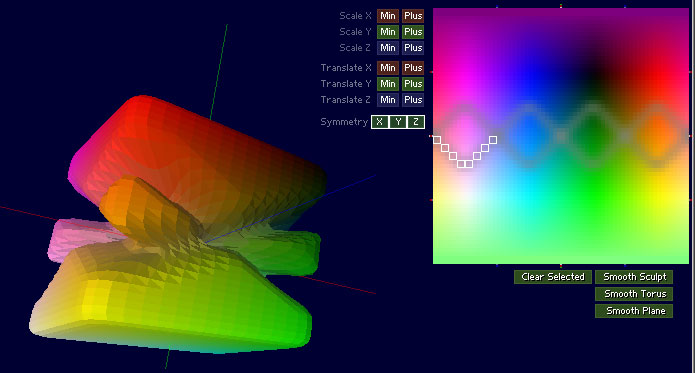
Since I got a symmetric kind of model, in the Texture Sketch Tool I only paint part of the texture for reference. And save this texture.
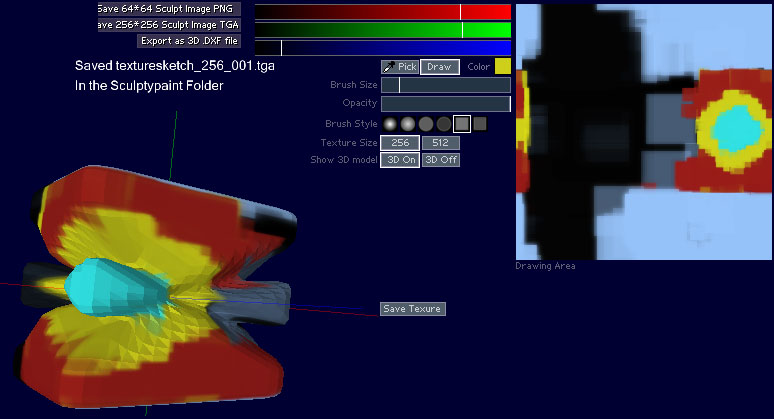
I put 3D Off (speeds up my computer), and switch to my favourite paintpackage.
In there I work on the texture, and after that load the texture back into sculptypaint.
Seamless Textures
Since I wrote Texl a seamless texture generator back in 1998/1999, I was thinking lets implement this into sculptypaint as well. Since my 'old' Texl program only supported 256*256 textures.
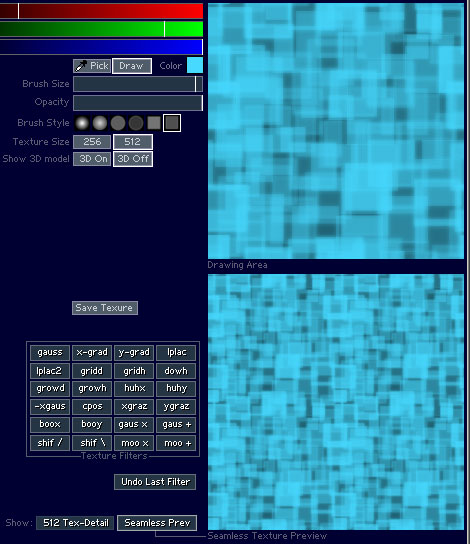
In this example, I choose a 512*512 texture
Put 3D Off so i can draw faster.
Choose a Brush Style and Brush Size; and start to Draw in the Drawing Area
See the (scaled) result in Seamless Texture Preview.
I put 512 Tex-Detail on. (in the bottom 512 Texture Detail. I can click to rough zoom around my texture)
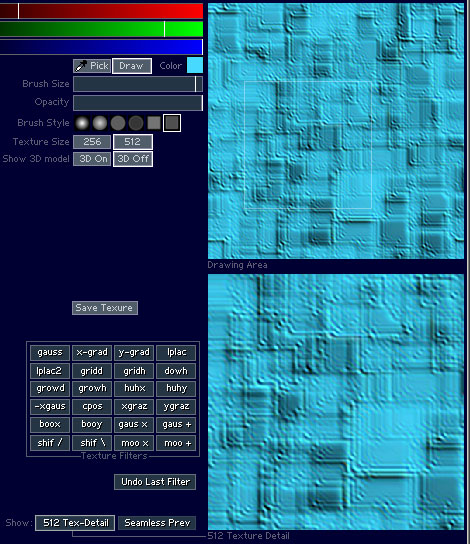
Playing around with some filters. In this example I pressed the filters "Shif \" and "gauss" several times.
Check the Saved 512*512 texture here: texture seamless
Tip: When I have created several 512 seamless textures, I can use a paintpackage to filter them around, mix them, change colors etc. To create some new seamless textures I need for certain projects.
Like this 512 bark example test is created mixing different seamless textures I created in sculptypaint.
Bake Texture (new in v.092)
** Currently Scultpypaint v.092 is only available to people that joined the sculptypaint group in secondlife.
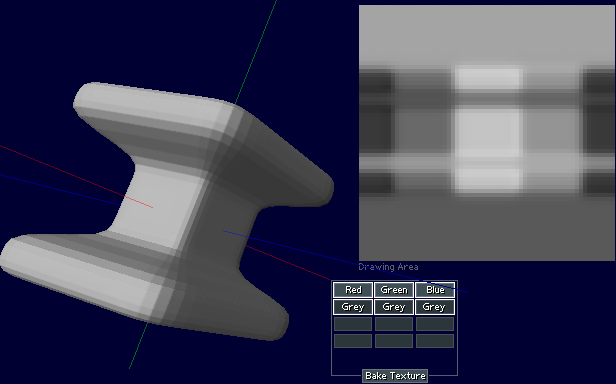
In v.092 I started to experiment with baking textures. For the moment it generates a texturemap that simulates 'simple' lightning. It can be also a nice reference if you want to texture your sculpty, and/or mix this texture with other textures, in your favourite paint packackage.
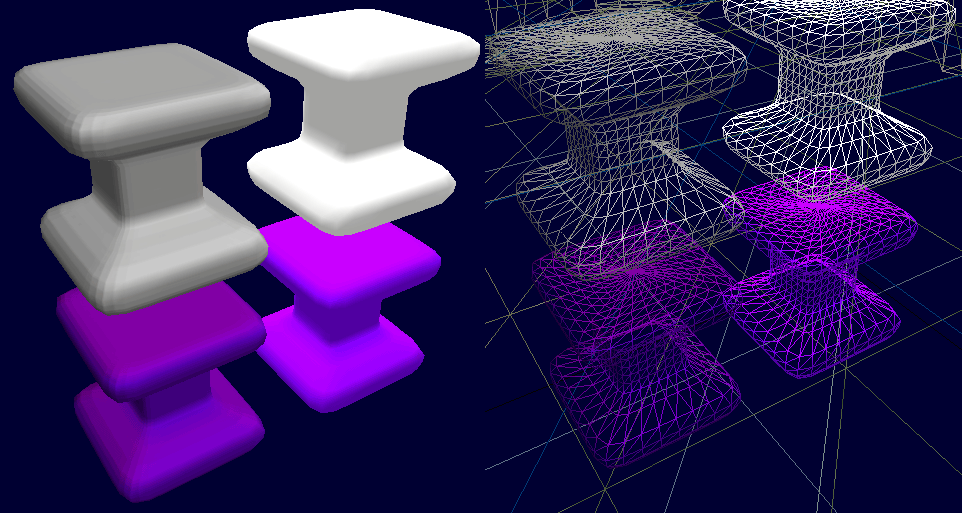 The result in Second Life, on the left the textured version, on the right default sculpty without texture. Since I baked the texture on a 64*64 model, it gives the illusion the model itself is higher detailed.
Normal Map Test (in v.092)
Normal mapping is nice way to make low polygon models (like sculpties) look better, currently Secondlife only supports normal-mapping in the current windlight-viewer and only for the water-reflection (and I guess your graphic-card should support normal-mapping as well). It would be a great if SL will support normal mapping for regular prims in the near future.
Currently my normal-map test works only for plane type sculpties.
Normalmap example; In the Stone Tool:
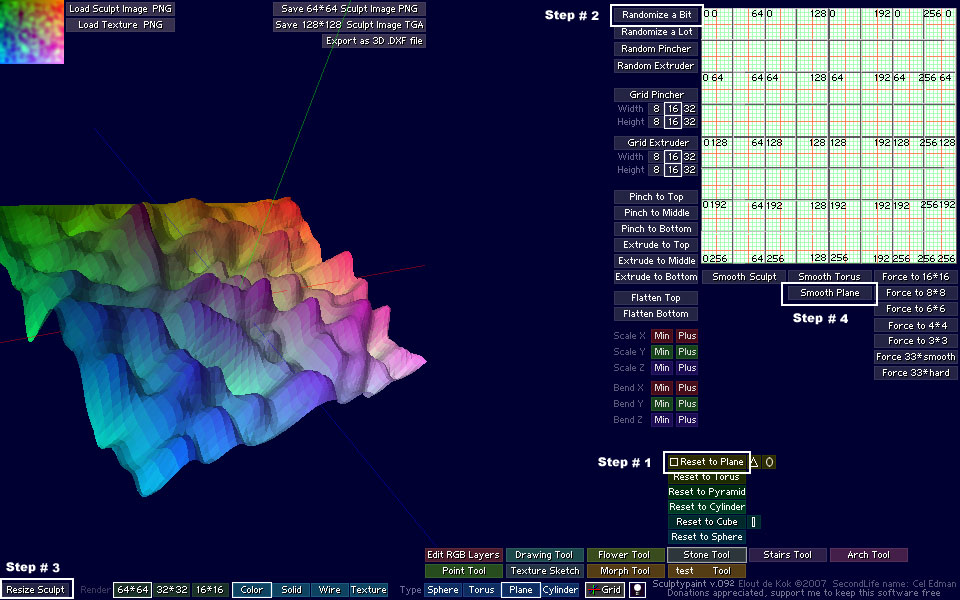
Step #1 Set my sculpt to Plane
Step #2 Press Randomize a bit
Step #3 Press Resize Sculpt
Step #4 Press Smooth Plane several times
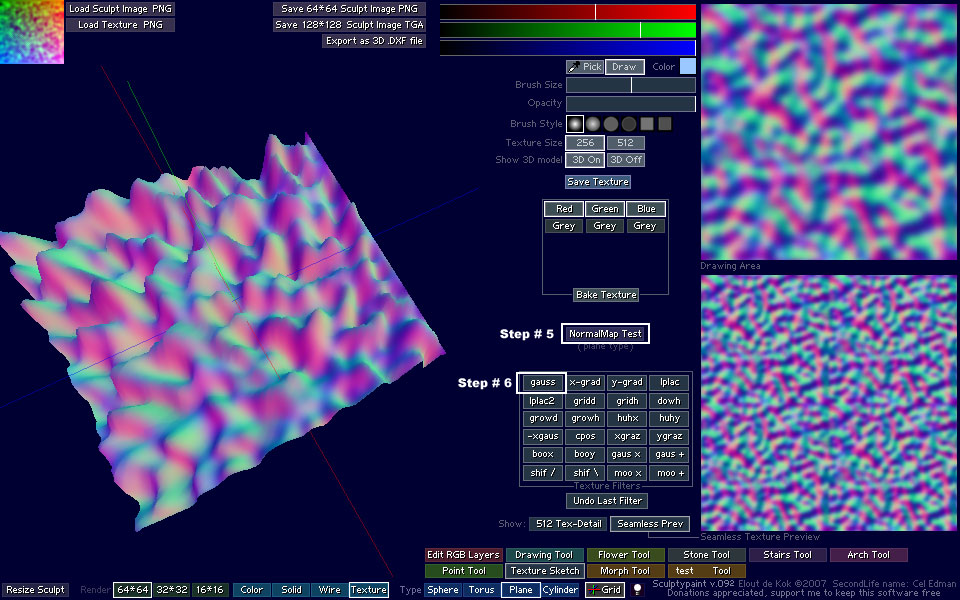
Next I go to the TextureSketch Tool:
Step #5 Press Normalmap Test
Step #6 Next I press the gauss button several times, so my texture becomes a kind of seamless for the top / bottom and left and right.
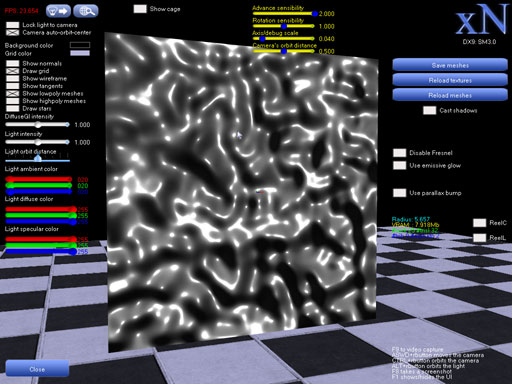
Testing my normalmap in XNormal (free to download)
Normal mapping explained / links:
> Normal mapping on wikipedia
> Normal mapping tutorial by Ben Cloward
< Back