< Back
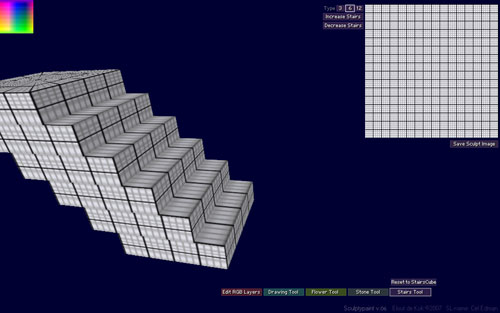
SculptyPaint - Stairs Tool
Shift your Sculpt object in the Z direction, for creating stairs.

Increase and Decrease Stairs Buttons
You can shift the sculpt front and back on the Z-axis
Type 3, 6, 12
Shifts just 3, 6 or 12 stairs in the object. (Note when changing them during shifting, can result in new forms of stairs)
![]()
Resets the sculpt-shape back to a basic StairsCube. (and resets the texture)
Important
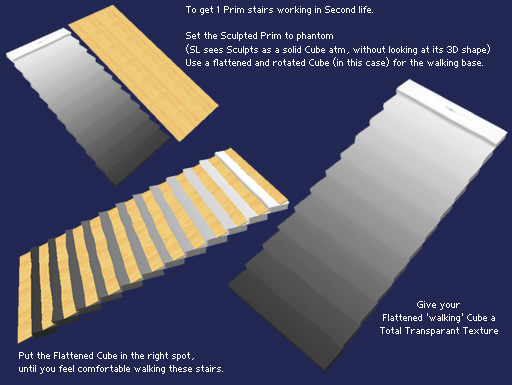
At the moment, SL looks to a sculpted prim like a cube. (Instead of the sculpted 3D shape). So to create working sculpted stairs. You have to put the Sculpt to phantom, Then scale, rotate and flatten a 3D box and put this just beneath the stairs into your sculpt object. I set it to maximum tranparant and give it a black color and no texture. Or you just could use a 100% transparant Texture. This way you can create a 2-prim working stairs.
Tips
You can add a picture or a logo, to the stairs Texture for some strange results. (Since it's just 1 object). Some nice dark to light fade etc.
< Back